
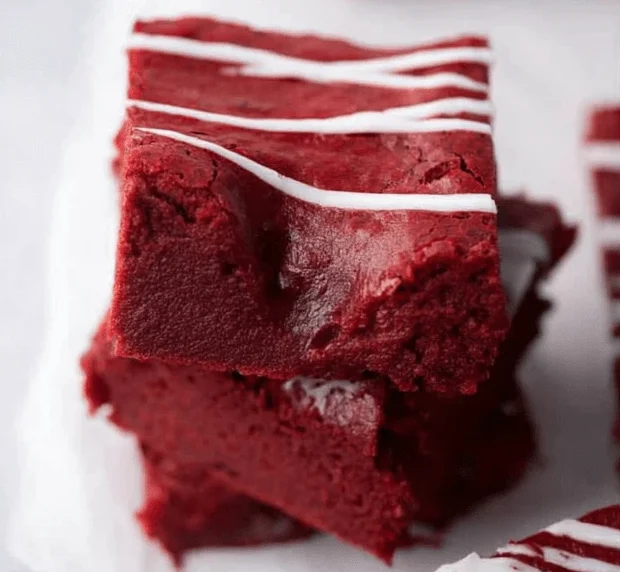
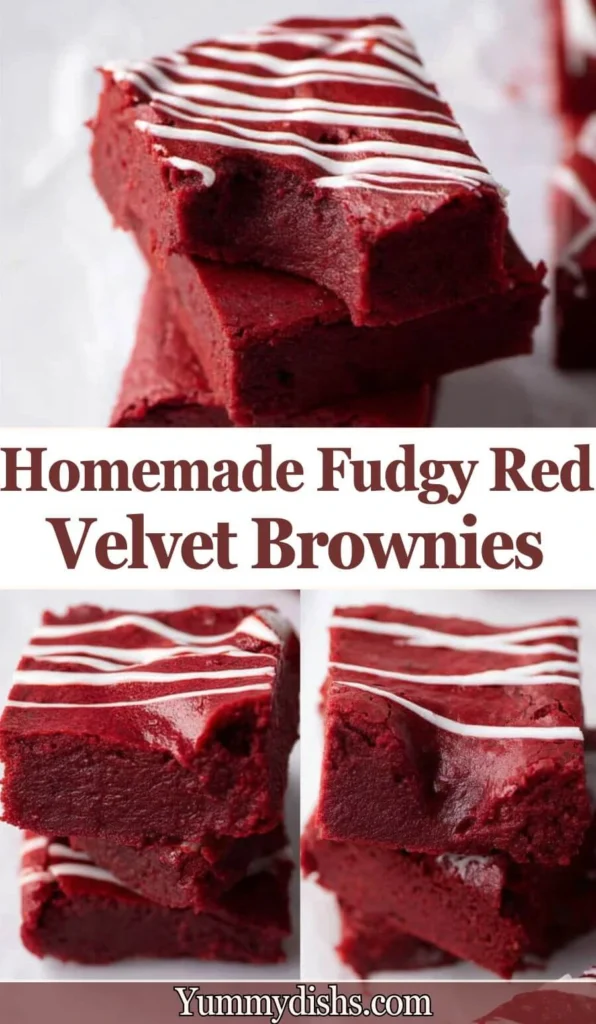
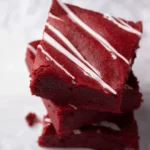
Fudgy Red Velvet Brownies are rich, moist, and perfectly chewy with that iconic red hue and chocolatey tang. They bring together the deep cocoa flavor of traditional brownies with the slight acidity and vibrant color of red velvet cake. Whether you’re baking for Valentine’s Day, Christmas, or just because—you’re going to fall in love at first bite.
Why You’ll Love This Recipe
- Super fudgy texture with a dense, melt-in-your-mouth bite
- Beautiful deep red color thanks to red gel food coloring
- Made from scratch with simple pantry ingredients
- A perfect balance of cocoa and vanilla with a slight tang from vinegar
- Easily customizable with white chocolate chips or a white chocolate drizzle
Ingredients
Equipment
- 8×8 inch (20×20 cm) baking pan
- Parchment paper
- Microwave-safe mixing bowl
- Whisk and rubber spatula
Ingredients
- ¾ cup unsalted butter, melted
- 2 oz chopped semi-sweet chocolate bar
- 1 ¼ cup granulated sugar
- 2 large eggs
- 2 teaspoon vanilla extract
- 1 teaspoon white vinegar
- ½ tablespoon red gel food coloring
- 2 tablespoons unsweetened cocoa powder
- 1 ¼ cup all-purpose flour
- ¼ teaspoon salt
- ½ cup white chocolate chips (optional – mix into batter or melt and drizzle on top)
Directions
Preheat & Prepare the Pan
Preheat your oven to 350°F (175°C). Grease and line an 8×8 inch baking pan with parchment paper, leaving an overhang on the sides for easy removal. Set aside.
Melt Butter and Chocolate
In a large microwave-safe mixing bowl, add the melted butter and chopped semi-sweet chocolate. Microwave in 30-second intervals, stirring between each, until fully melted and smooth. Let cool slightly.
Mix in Sugar & Wet Ingredients
Whisk the granulated sugar into the butter-chocolate mixture until well combined.
Add the eggs, one at a time, whisking well after each addition.
Stir in the vanilla extract, white vinegar, and red gel food coloring. Mix until the color is evenly distributed.
Sift and Add Dry Ingredients
In a separate bowl, sift together the cocoa powder, all-purpose flour, and salt.
Gradually fold the dry ingredients into the wet mixture using a rubber spatula. Mix just until no dry streaks remain—do not overmix.
Add Optional Mix-ins
If using, fold in the white chocolate chips for added sweetness and texture.
Bake
Pour the brownie batter into the prepared pan. Use a spatula to spread it evenly into the corners.
Bake in the preheated oven for 30–35 minutes, or until a toothpick inserted into the center comes out with a few moist crumbs (not wet batter).
Cool and Slice
Allow the brownies to cool completely in the pan before lifting out with parchment and slicing.
For an optional finishing touch, drizzle melted white chocolate over the cooled brownies before slicing.
Pro Tips and Variations
- Use red gel food coloring for a bold, vibrant color without thinning the batter.
- Do not overmix after adding the flour to keep the texture soft and fudgy.
- A toothpick with a few moist crumbs (not clean!) means they’re perfectly baked.
- Add a swirl of cream cheese or peanut butter to the batter for extra richness.
- Top with festive sprinkles or heart-shaped candies for Valentine’s Day.
Serving Suggestions
- Serve warm with vanilla ice cream
- Drizzle with melted white chocolate or a dollop of whipped cream
- Cut into heart shapes for festive occasions
- Pair with a glass of milk or a cup of coffee
Storage/Reheating
Room Temperature: Store in an airtight container for up to 3 days.
Refrigerator: Store up to 1 week for best freshness.
Freezer: Freeze wrapped squares in a container or bag for up to 2 months. Thaw overnight or microwave briefly before serving.
FAQs
Can I use regular liquid food coloring instead of gel?
A: You can, but you’ll need more, and it may thin your batter. Gel is best for bold color.
Can I make these brownies ahead of time?
A: Yes! They’re perfect for making a day or two in advance and keep well at room temp or in the fridge.
How do I know when they’re done baking?
A: A toothpick inserted into the center should come out with a few moist crumbs—not completely clean.
Can I skip the vinegar?
A: It’s key to achieving that signature red velvet tang and balancing the cocoa. Stick with it!
Conclusion
These Fudgy Red Velvet Brownies are a celebration of color, texture, and flavor. With their deep cocoa richness, moist crumb, and iconic red hue, they’re as beautiful as they are delicious. Whether you’re baking for a loved one or treating yourself, these brownies are guaranteed to satisfy your sweet tooth.
Fudgy Red Velvet Brownies
- Total Time: 45 minutes
- Yield: 16 servings 1x
Description
These fudgy red velvet brownies are rich, moist, and made from scratch with cocoa, red gel coloring, and a hint of tang—perfect for any celebration!
Ingredients
Equipment
8x8 inch (20×20 cm) baking pan
Parchment paper
Microwave-safe mixing bowl
Whisk and rubber spatula
Ingredients
¾ cup unsalted butter, melted
2 oz chopped semi-sweet chocolate bar
1 ¼ cup granulated sugar
2 large eggs
2 teaspoon vanilla extract
1 teaspoon white vinegar
½ tablespoon red gel food coloring
2 tablespoons unsweetened cocoa powder
1 ¼ cup all-purpose flour
¼ teaspoon salt
½ cup white chocolate chips (optional – mix into batter or melt and drizzle on top)
Instructions
Step 1: Preheat & Prepare the Pan
Preheat your oven to 350°F (175°C). Grease and line an 8×8 inch baking pan with parchment paper, leaving an overhang on the sides for easy removal. Set aside.
Step 2: Melt Butter and Chocolate
In a large microwave-safe mixing bowl, add the melted butter and chopped semi-sweet chocolate. Microwave in 30-second intervals, stirring between each, until fully melted and smooth. Let cool slightly.
Step 3: Mix in Sugar & Wet Ingredients
Whisk the granulated sugar into the butter-chocolate mixture until well combined.
Add the eggs, one at a time, whisking well after each addition.
Stir in the vanilla extract, white vinegar, and red gel food coloring. Mix until the color is evenly distributed.
Step 4: Sift and Add Dry Ingredients
In a separate bowl, sift together the cocoa powder, all-purpose flour, and salt.
Gradually fold the dry ingredients into the wet mixture using a rubber spatula. Mix just until no dry streaks remain—do not overmix.
Step 5: Add Optional Mix-ins
If using, fold in the white chocolate chips for added sweetness and texture.
Step 6: Bake
Pour the brownie batter into the prepared pan. Use a spatula to spread it evenly into the corners.
Bake in the preheated oven for 30–35 minutes, or until a toothpick inserted into the center comes out with a few moist crumbs (not wet batter).
Step 7: Cool and Slice
Allow the brownies to cool completely in the pan before lifting out with parchment and slicing.
For an optional finishing touch, drizzle melted white chocolate over the cooled brownies before slicing
Notes
Use high-quality semi-sweet chocolate for deep chocolate flavor.
For thinner brownies, use a 9×9 pan but reduce baking time slightly.
Wait until brownies are fully cooled before slicing to get clean, even squares.
- Prep Time: 15 minutes
- Cook Time: 30 minutes
- Category: Dessert
- Method: Baking
- Cuisine: American
Keywords: red velvet brownies, fudgy brownies, red velvet dessert, Valentine’s Day brownies