Best Fudgy Chocolate Brownie Cookies
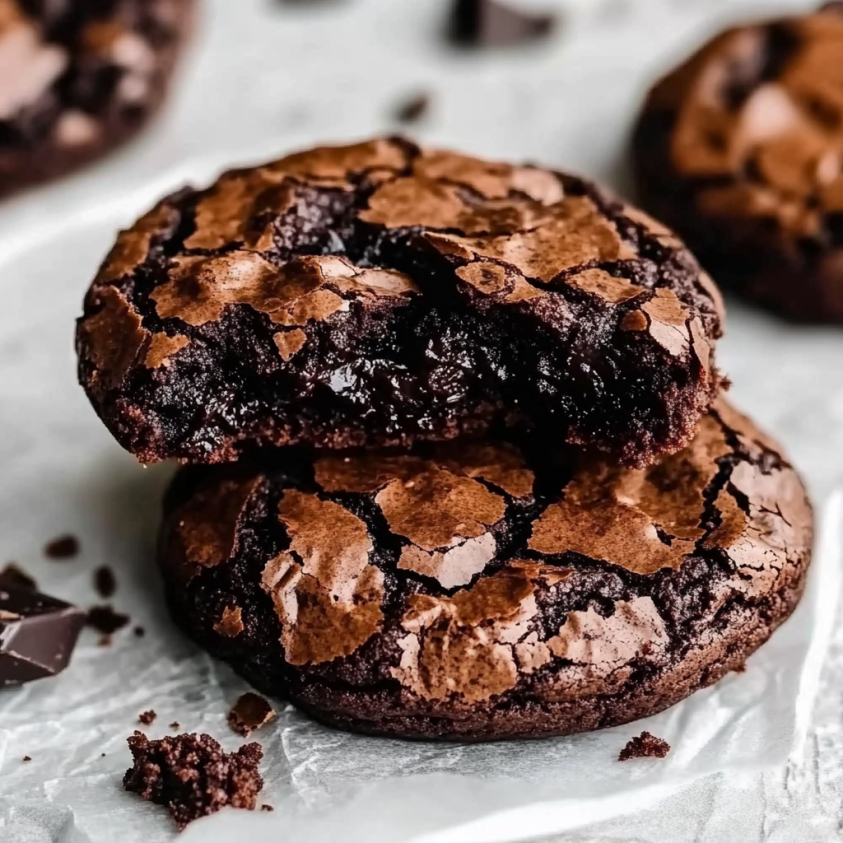
There’s something magical that happens when you combine the best qualities of two beloved desserts. As a lifelong chocolate enthusiast, I’ve spent years perfecting what I consider the ultimate chocolate indulgence: fudgy chocolate brownie cookies. These delectable treats capture everything we love about brownies—that shiny, crackly top and rich, dense interior—while maintaining the convenience and portability of a cookie. The first time I pulled a batch from the oven, watching as they cooled and crinkled to perfection, I knew I’d stumbled upon something special. Today, I’m sharing my foolproof recipe, along with all the tips and tricks I’ve gathered through countless batches (and a few delicious failures) to help you create these chocolate masterpieces in your own kitchen.
If you’ve ever found yourself torn between baking brownies or cookies, these fudgy chocolate brownie cookies are the answer to your dessert dilemma. They offer the best of both worlds: the intense chocolate flavor and chewy texture of a perfect brownie edge piece, combined with the convenience and portion control of a cookie.
What sets these cookies apart from standard chocolate cookies is their unique texture. While regular chocolate chip cookies tend to be either crispy or soft, these brownie cookies have:
- A shiny, crackly top that’s unmistakably brownie-like
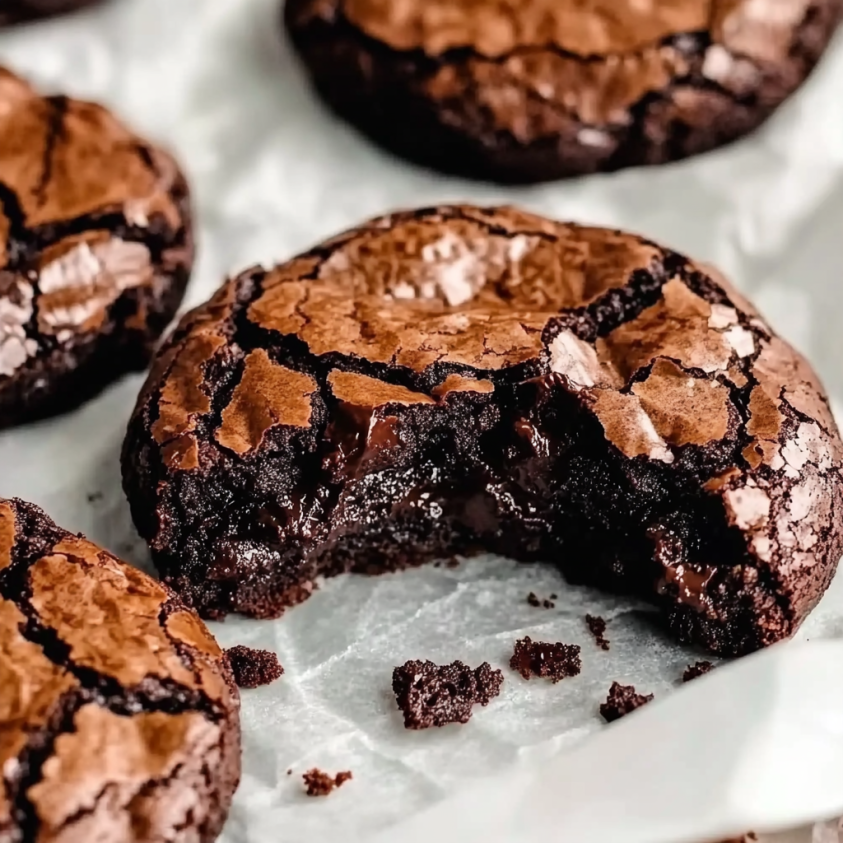
- An intensely fudgy, almost truffle-like interior
- A chewy edge that provides the perfect textural contrast
- Deep chocolate flavor in every bite
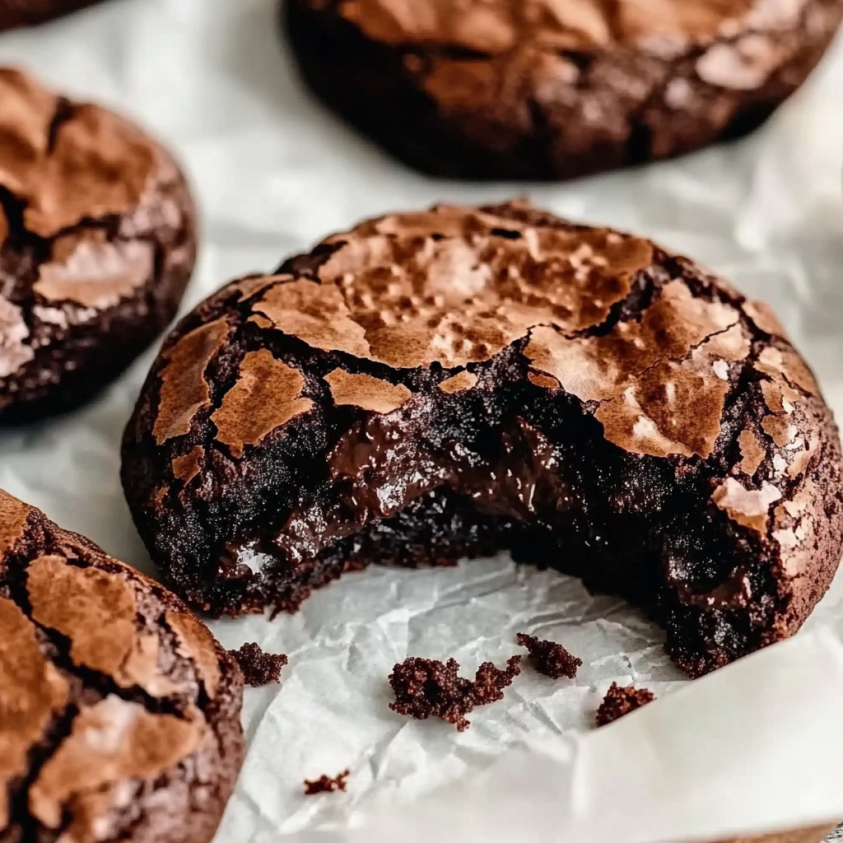
The cookies also have a gorgeous appearance—dark and glossy with beautiful cracks across the surface that form naturally as they bake. They’re showstoppers on any cookie plate and are guaranteed to disappear first at any gathering.
You might also love our White Chocolate Blueberry Cheesecake Cupcakes, another delightful variation that’s perfect for any sweet occasion.
The Science Behind the Perfect Brownie Cookie
Creating the perfect brownie cookie isn’t just about throwing ingredients together—there’s some fascinating food science at work! Understanding what makes these cookies special helps ensure success every time you bake them.
The Crackly Top Secret
That signature shiny, crackly top that we all love about brownies comes from dissolved sugar forming a thin meringue-like layer during baking. When you whip eggs and sugar together until they’re light and fluffy, you’re incorporating tiny air bubbles and dissolving the sugar. As the cookies bake, this mixture rises to the surface and creates that distinctive crackly crust.
The Chocolate Method
Using melted chocolate rather than just cocoa powder is crucial for achieving the fudgy texture. Melted chocolate contains cocoa butter, which solidifies as the cookies cool, giving them that rich, truffle-like interior. Cocoa powder alone would create a drier, more cake-like texture.
The Perfect Balance of Ingredients
Each ingredient plays a vital role:
- Butter: Provides richness and helps create that melt-in-your-mouth quality
- Eggs: Act as a binder and contribute to the shiny top
- Brown sugar: Adds moisture and chewiness
- Granulated sugar: Helps create the crackly top
- Limited flour: The relatively low flour-to-chocolate ratio ensures these remain fudgy rather than cakey
For another simple recipe using brownie mix, check out these Easy Brownie Mix Cookies.
Essential Ingredients for Perfect Brownie Cookies
(Tip: You’ll find the full list of ingredients and measurements in the recipe card below.)
The quality of your ingredients makes all the difference in these cookies. Let’s break down what you’ll need and how to choose the best options.
Chocolate: The Star of the Show
The foundation of these cookies is excellent chocolate. I recommend using:
For the melted chocolate:
- High-quality dark chocolate (60-70% cocoa) for a deep, complex flavor
- Look for chocolate with minimal additives—the ingredients list should be short
- Bar chocolate melts more smoothly than chips (which contain stabilizers)
For the cocoa powder:
- Dutch-processed cocoa powder provides a smoother, richer flavor
- It has a deeper color that makes your cookies look more decadent
- The lower acidity works beautifully with the other ingredients
My favorite brands include:
- Ghirardelli 60% Cacao Bittersweet Chocolate
- Valrhona cocoa powder
- Guittard chocolate bars
If premium chocolate is outside your budget, even standard baker’s chocolate will produce delicious results—these cookies are very forgiving!
The Perfect Sugar Combination
Using a mix of sugars creates the ideal texture:
- Brown sugar: The molasses content adds moisture and a subtle caramel undertone
- Granulated sugar: Creates the crackly, shiny top we’re looking for
I prefer a ratio of about 2:1 brown sugar to granulated sugar for the perfect balance of moisture and crispness.
Flour and Leavening
Unlike many cookies that rely heavily on flour for structure, these brownie cookies use relatively little:
- All-purpose flour: Just enough to hold everything together
- A pinch of baking powder: For a slight rise without making them cakey
Flavor Enhancers
A few additional ingredients elevate the flavor profile:
- Vanilla extract: Enhances the chocolate flavor (use pure, not imitation)
- Espresso powder (optional): Intensifies the chocolate flavor without adding coffee taste
- Sea salt: Balances the sweetness and makes the chocolate flavor pop
How to Make the Best Fudgy Chocolate Brownie Cookies
Now that we understand the ingredients, let’s walk through the process of making these incredible cookies.
Preparation: Setting Yourself Up for Success
Before we begin mixing, let’s get everything ready:
- Preheat your oven to 350°F (175°C) – A properly preheated oven ensures even baking
- Line baking sheets with parchment paper – This prevents sticking and makes cleanup easier
- Gather all ingredients and measure them out – Baking is a science, and accuracy matters!
- Bring eggs to room temperature – They’ll incorporate better with the other ingredients
Melting Chocolate & Butter: Best techniques for smooth results
The way you melt your chocolate affects the final texture of your cookies:
Option 1: Double boiler method (preferred)
- Add chopped chocolate and butter to a heatproof bowl
- Place over a pot of barely simmering water (make sure the bowl doesn’t touch the water)
- Stir occasionally until completely melted and smooth
- Remove from heat and let cool slightly
Option 2: Microwave method
- Place chopped chocolate and butter in a microwave-safe bowl
- Heat in 20-second intervals, stirring between each
- Stop when almost completely melted and stir until smooth (residual heat will melt the rest)
Important tip: Don’t overheat chocolate—it can seize and become grainy!
Mixing the Ingredients: Avoiding over-mixing for the perfect texture
Follow this sequence for the perfect texture:
- Create the base: In a large bowl, whisk eggs, brown sugar, and granulated sugar until light and fluffy (about 3-4 minutes with an electric mixer)
- Add melted chocolate: Slowly pour the slightly cooled chocolate-butter mixture into the egg mixture while whisking
- Add flavor enhancers: Mix in vanilla extract and espresso powder (if using)
- Incorporate dry ingredients: Gently fold in the sifted flour, cocoa powder, baking powder, and salt just until combined
- Don’t overmix: Stop as soon as no flour streaks remain to avoid tough cookies
The Crucial Chilling Step
This step might test your patience, but it’s worth it:
- Cover the bowl with plastic wrap and refrigerate for at least 30 minutes (1 hour is better)
- Chilling firms up the dough, prevents spreading, and develops flavors
- The dough should be scoopable but not runny
Shaping and Baking
Now for the fun part:
- Using a cookie scoop or tablespoon, portion dough into 1.5-inch balls
- Place on prepared baking sheets, leaving 2 inches between cookies
- Optional: Sprinkle with a few flakes of sea salt
- Bake for 10-12 minutes until the edges are set but the centers still look slightly underdone
- The cookies will continue to cook on the hot baking sheet
Patience is key for the perfect texture:
- Let cookies cool on the baking sheet for 5 minutes (they’re very soft when hot)
- Carefully transfer to a wire rack to cool completely
- As they cool, they’ll develop that perfect fudgy interior and chewy edge
Troubleshooting Common Issues
Even experienced bakers encounter challenges. Here’s how to solve the most common problems:
Problem: Cookies spread too much and are flat
Solution:
- Chill the dough longer
- Make sure your oven is properly preheated
- Check that your butter wasn’t too hot when mixed with other ingredients
Problem: Cookies are cakey instead of fudgy
Solution:
- Reduce the amount of flour
- Don’t overmix the batter
- Make sure you’re using melted chocolate, not just cocoa powder
Problem: Cookies don’t have a shiny top
Solution:
- Beat the eggs and sugar longer to create that meringue-like mixture
- Make sure the chocolate was warm (but not hot) when added
- Check that your baking powder is fresh
Problem: Cookies are too dry
Solution:
- Reduce baking time by 1-2 minutes
- Add an extra egg yolk to the batter
- Check your oven temperature with an oven thermometer (many run hot)
Creative Variations to Try
Once you’ve mastered the basic recipe, try these delicious variations:
Mix-Ins for Extra Texture
- Chopped nuts: Walnuts or pecans add a wonderful crunch
- Chocolate chunks: For pockets of melty chocolate goodness
- White chocolate chips: Create a beautiful color contrast
- Dried cherries: Their tartness complements the rich chocolate
Flavor Twists
- Mint chocolate: Add ¼ teaspoon of mint extract
- Orange chocolate: Mix in 1 tablespoon of orange zest
- Mocha: Increase the espresso powder to 1 tablespoon
- Chocolate-peanut butter: Swirl in 2 tablespoons of peanut butter
- Chocolate-tahini: Swirl in 2 tablespoons of tahini for a nutty flavor
Special Touches
- Cookie sandwiches: Fill two cookies with vanilla ice cream
- Thumbprints: Press a dimple in each cookie before baking and fill with jam after cooling
- Holiday version: Add crushed candy canes or mint chips for a festive touch
- S’mores style: Top with a marshmallow during the last minute of baking
Storing Your Brownie Cookies
To keep your cookies tasting fresh:
Short-Term Storage (Up to 5 Days)
- Store in an airtight container at room temperature
- Place a piece of bread in the container to maintain moisture
- Separate layers with parchment paper to prevent sticking
Freezing Options
- Baked cookies: Freeze in an airtight container for up to 3 months
- Cookie dough: Roll into balls, freeze on a baking sheet, then transfer to a freezer bag
- Bake frozen dough balls directly from frozen, adding 2-3 minutes to the baking time
Perfect Pairings
These cookies are delicious on their own, but pairing them with complementary flavors elevates the experience:
- Classic cold milk: Nothing beats this traditional combination
- Hot chocolate: Double the chocolate pleasure
- Coffee or espresso: The bitterness balances the sweetness perfectly
- Vanilla ice cream: Create mini ice cream sandwiches
- Fruit smoothies: The freshness contrasts with the rich cookies
- Chai tea: The warm spices complement the chocolate beautifully
Making Memories with Brownie Cookies
Some of my favorite memories involve these cookies:
- Baking them with my nieces and nephews on rainy afternoons
- Packaging them in decorative tins as heartfelt holiday gifts
- Bringing them to office potlucks where they always disappear first
- Making emergency batches at midnight for unexpected cravings
These cookies have a way of bringing people together and creating moments of pure joy. There’s something about the combination of chocolate and the familiar comfort of a cookie that makes everyone smile.
FAQs
Can I use cocoa powder instead of melted chocolate?
No, melted chocolate is essential for the fudgy texture.
They have a brownie-like texture, with a shiny top and chewy center.
Can I make the dough ahead of time?
Yes! Chill the dough for up to 24 hours before baking.
The edges should be set, but the center should look slightly under baked.
Conclusion
In a world of complicated desserts and fancy techniques, there’s something special about a simple cookie that delivers so much satisfaction. These fudgy chocolate brownie cookies might seem like just another chocolate cookie recipe, but they represent something more—they’re the perfect example of how a few quality ingredients, treated with care, can create something truly extraordinary.
What I love most about these cookies is their versatility. They’re elegant enough for special occasions but simple enough for everyday baking. They satisfy intense chocolate cravings but aren’t so rich that you can only eat one (though you might want to!).
More chocolate recipes you’ll love:
Chocolate Mint Cheesecake Bars
Decadent Chocolate Pecan Ooey Gooey Butter Cake
Hot Fudge Chocolate Pudding Cake
No-Bake Chocolate Peanut Butter Cheesecake


Fudgy Chocolate Brownie Cookies
- Total Time: 25 minutes
- Yield: 12 cookies 1x
Description
These fudgy chocolate brownie cookies combine the richness of brownies with the chewy texture of cookies. They have crackly tops, gooey centers, and deep chocolate flavor—perfect for any chocolate lover!
Ingredients
- 2/3 cup (94 g) all-purpose flour
- 2 Tbsp (12 g) Dutch process unsweetened cocoa, sifted
- 1 tsp (4 g) baking powder
- 1/4 tsp (1.5 g) salt
- 8 ounces (226 g) semisweet chocolate, finely chopped (recommended: 66-70% chocolate)
- 1/4 cup (56 g) unsalted butter, cubed
- 2 large eggs (100 g), at room temperature
- 1/2 cup (100 g) granulated sugar
- 1/2 cup (92 g) light brown sugar
- 1 tsp (4 g) vanilla extract
- 1/2 cup (85 g) semisweet chocolate chips
- flaky salt, for topping
Instructions
Preheat your oven to 350°F and line two baking sheets with parchment paper. This prevents sticking and makes cleanup a breeze!
In a medium bowl, whisk together your dry ingredients—flour, cocoa powder, baking powder, and salt. Set this aside while you work on the chocolate mixture.
Chop your chocolate into small pieces and place it in a heat-proof bowl along with the butter. Create a double boiler by setting this bowl over a saucepan with about an inch of gently simmering water (make sure the water doesn’t touch the bottom of your bowl!). Stir occasionally until everything is completely melted and smooth. Remove from heat and let it cool slightly while you move to the next step.
In your large mixer bowl, combine eggs, brown and granulated sugars, and vanilla extract. Using the whisk attachment, beat on medium speed for a full 5 minutes. Don’t rush this step! This creates that beautiful volume and will help give your cookies their shiny, crackly tops. The mixture should be pale and doubled in size when you’re done.
Reduce your mixer to low speed and slowly pour in the melted chocolate mixture. Mix for about 1 minute until well combined. Then add your dry ingredient mixture and mix on low for just 20 seconds—until barely combined. Remember: overmixing leads to tough cookies!
Using a spatula, gently fold in the chocolate chips. Your dough will look very gooey at this point—more like brownie batter than traditional cookie dough. That’s exactly what we want!
Here’s a pro tip: lightly spray your medium cookie scoop with nonstick spray to help the sticky dough release easily. Scoop your cookies directly onto the prepared baking sheets, spacing them about 2 inches apart. I recommend no more than 10 cookies per sheet as they will spread a bit.
Slide those beauties into your preheated oven and bake for 12-14 minutes. For even baking, rotate your pans halfway through (front to back, top to bottom if using multiple racks). You’ll know they’re done when the tops are shiny and crackly but the centers still look slightly soft.
As soon as the cookies come out of the oven, sprinkle them with a little flaky sea salt. This optional step adds a gorgeous flavor contrast that makes the chocolate taste even more intense!
Let the cookies cool on the baking sheets for 10 minutes—they’re very fragile when hot! After that, carefully transfer them to a wire rack to cool completely. The texture develops as they cool, so try to be patient (I know it’s hard!).
Keep your brownie cookies in an airtight container at room temperature. They’re best enjoyed within 1-2 days, but I doubt they’ll last that long!
Notes
If your dough seems too runny to scoop, pop it in the refrigerator for 15-20 minutes to firm up slightly. The cookies will still spread properly when baked.
- Prep Time: 15 minutes
- Cook Time: 10 minutes
- Category: Dessert, Snack
- Method: Baking
- Cuisine: American
Keywords: fudgy chocolate brownie cookies, chewy brownie cookies, chocolate cookies, homemade brownie cookies